Step 1: Obtaining Personal VPN Settings
* You can skip this step if you have already registered and created your personal settings.
-
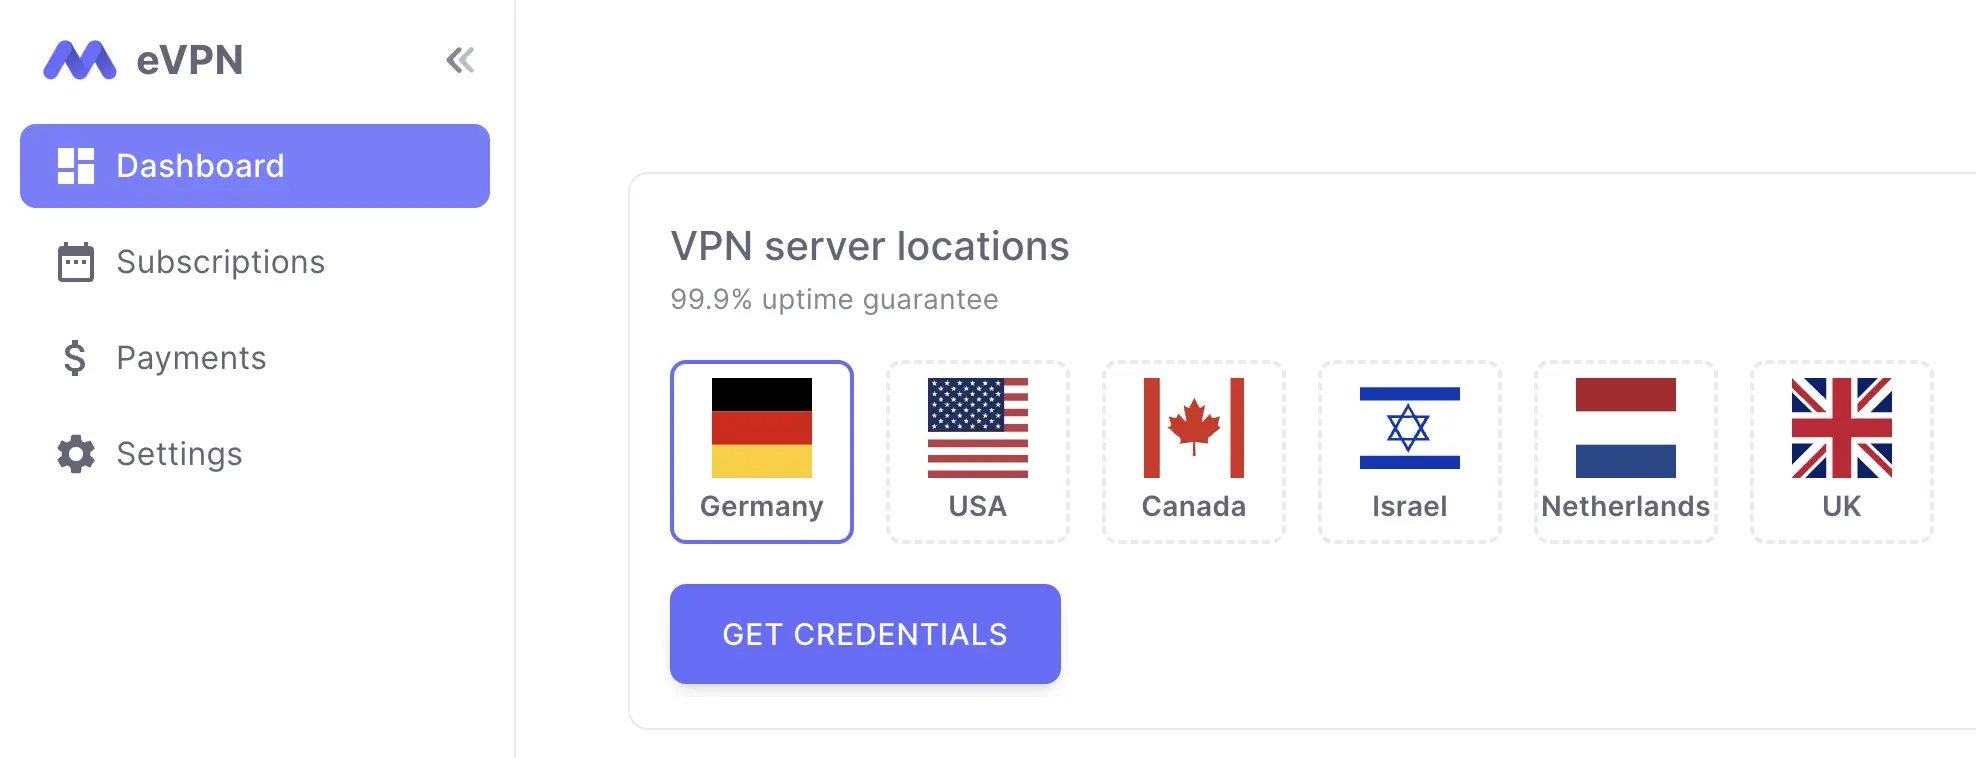
Log in to your VPN account (if you don't have one, sign up).
-
Select one of the available servers that your subscription allows and click "Get Credentials".
Step 2: Installation and Configuration of OpenVPN Profile
-
In your account, in the "OpenVPN" section, a profile file in ".ovpn" format will be available. Download it to your Mac.
-
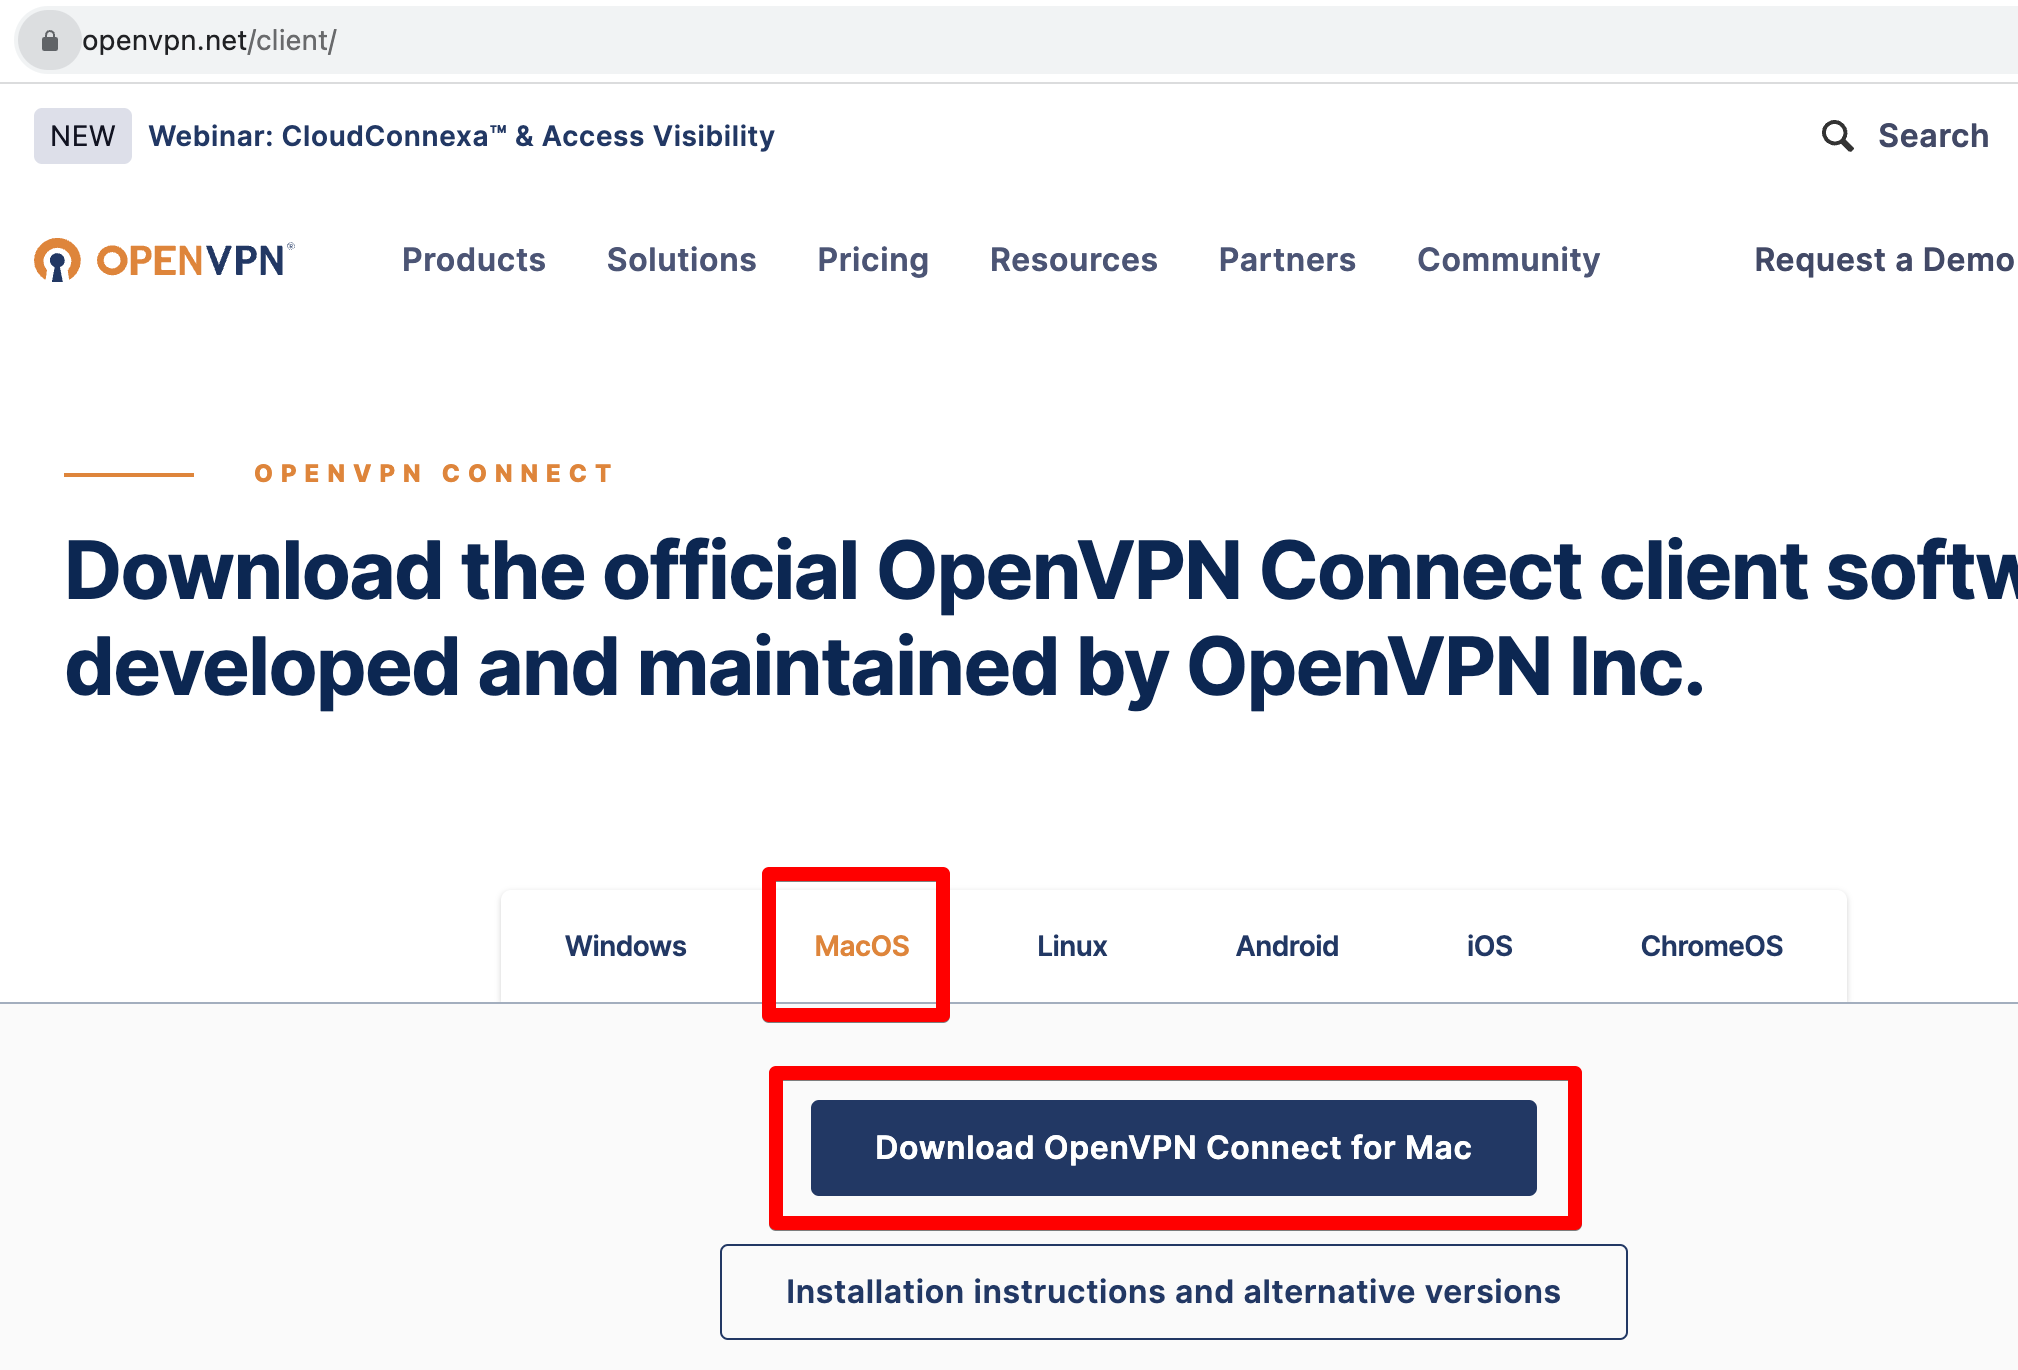
Go to the official OpenVPN developer's website, download and install "OpenVPN Connect" from the following link: https://openvpn.net/client/
-
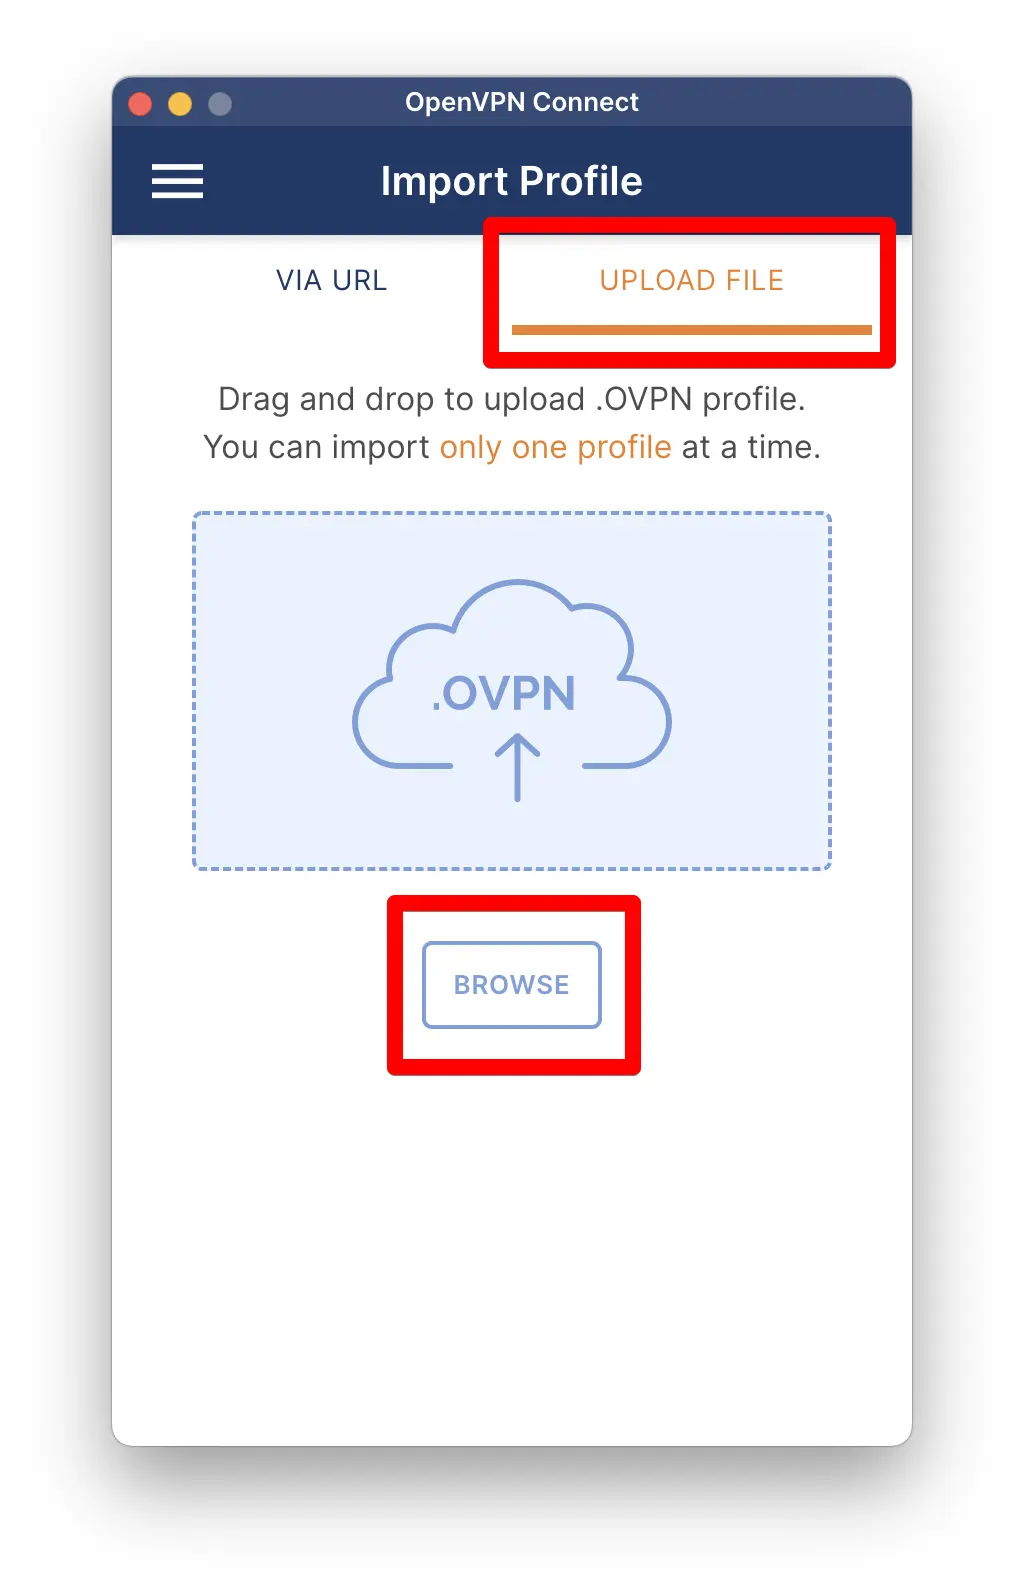
After launching the application, select "Import Profile" > "Upload File" and click "Browse".
-
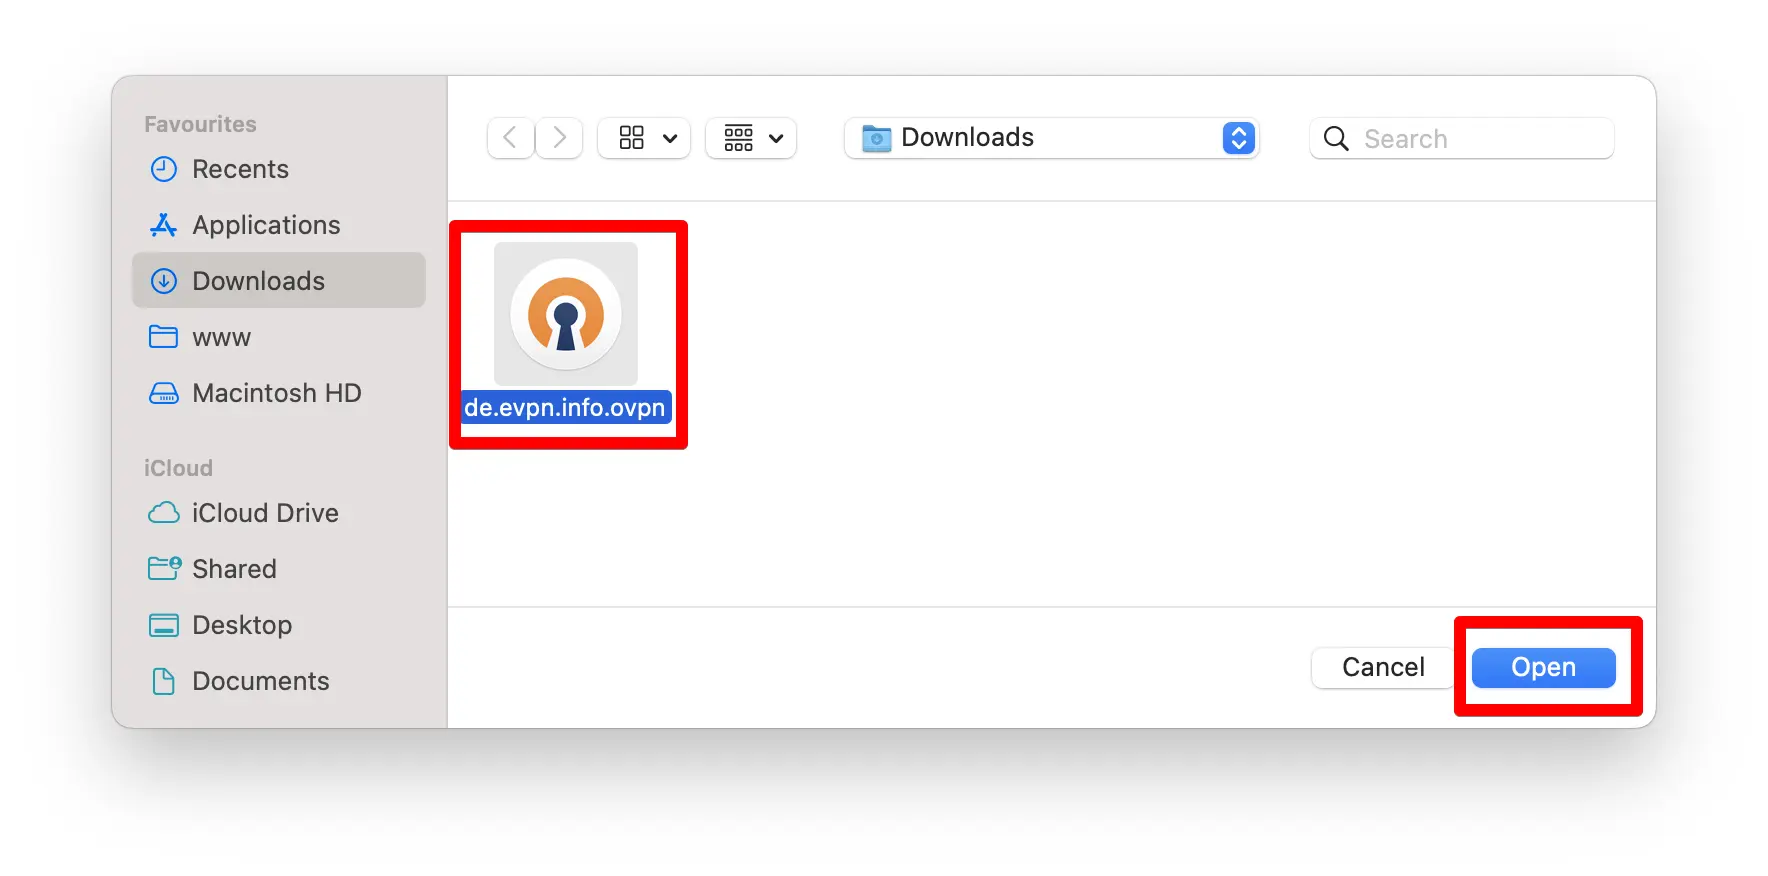
Select the profile file "xx.evpn.info.ovpn" (where "xx" is the country code you chose when obtaining the VPN credentials).
 Congratulations! Your OpenVPN is configured. Now you can use the most popular and stable VPN at any time!
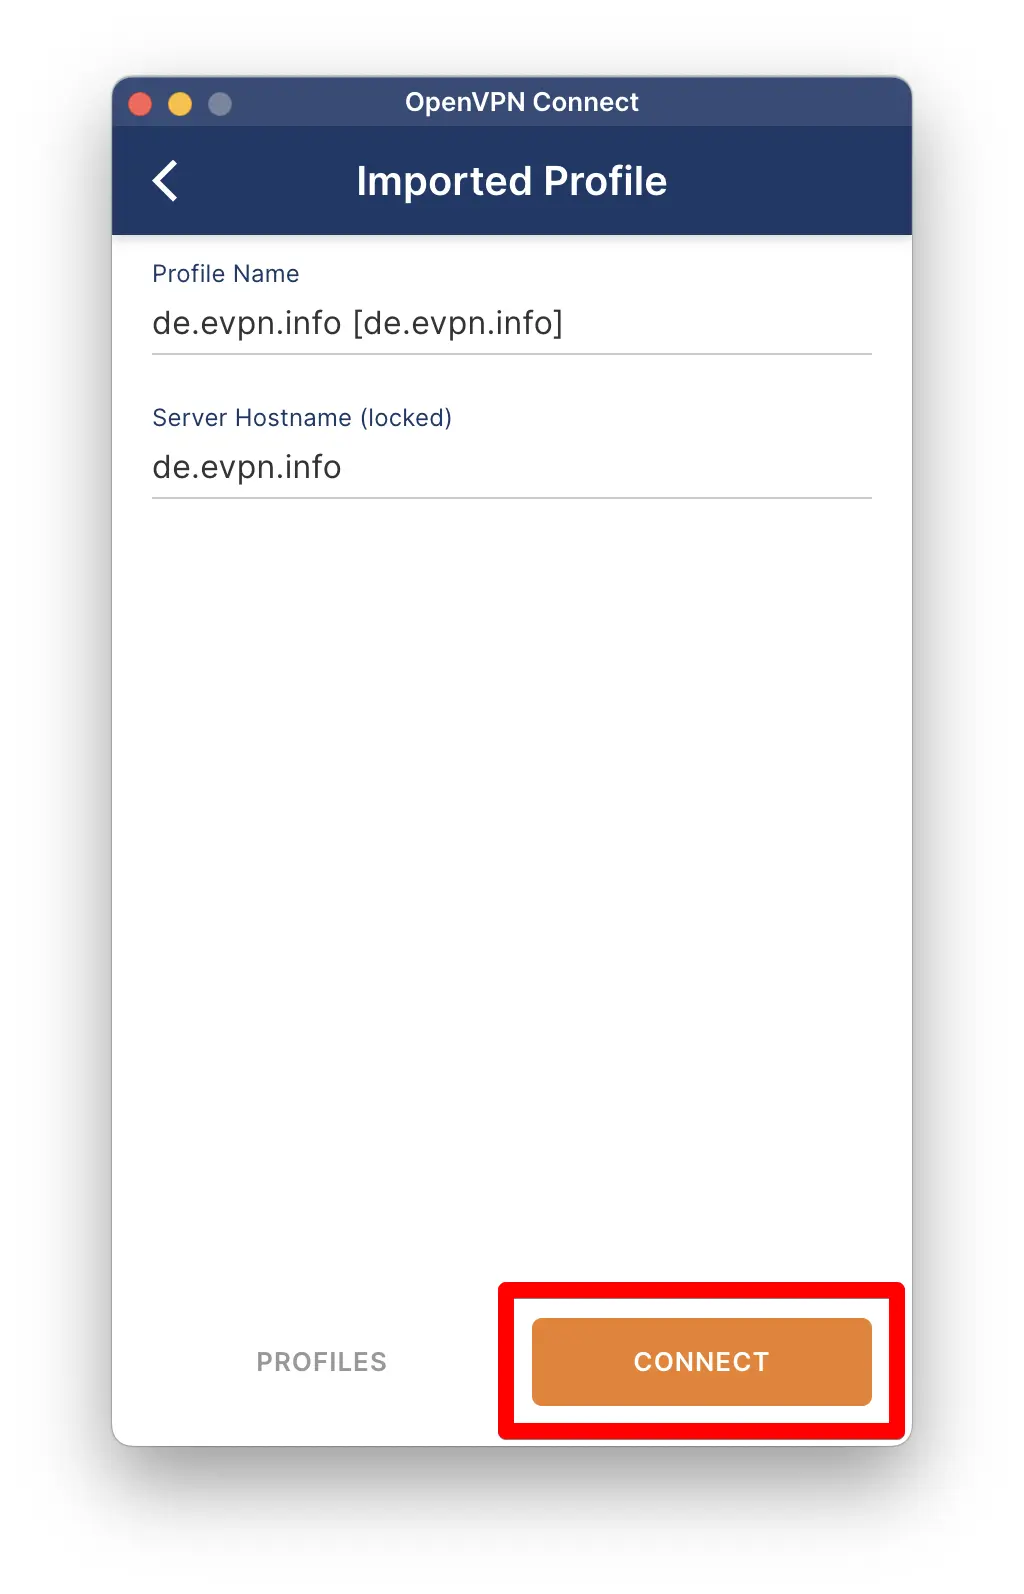
Step 3: Checking Your VPN Connection
-
Click on "Connect", as shown in the screenshot above.
-
Open any location check site like https://ipaddress.my/ and make sure that the country you selected when obtaining your personal VPN settings is detected.
For subsequent launches of the application, you can simply toggle the VPN connection on/off in the "Profiles" section.