Step 1: Obtaining Personal VPN Settings
* You can skip this step if you have already registered and created your personal settings.
-
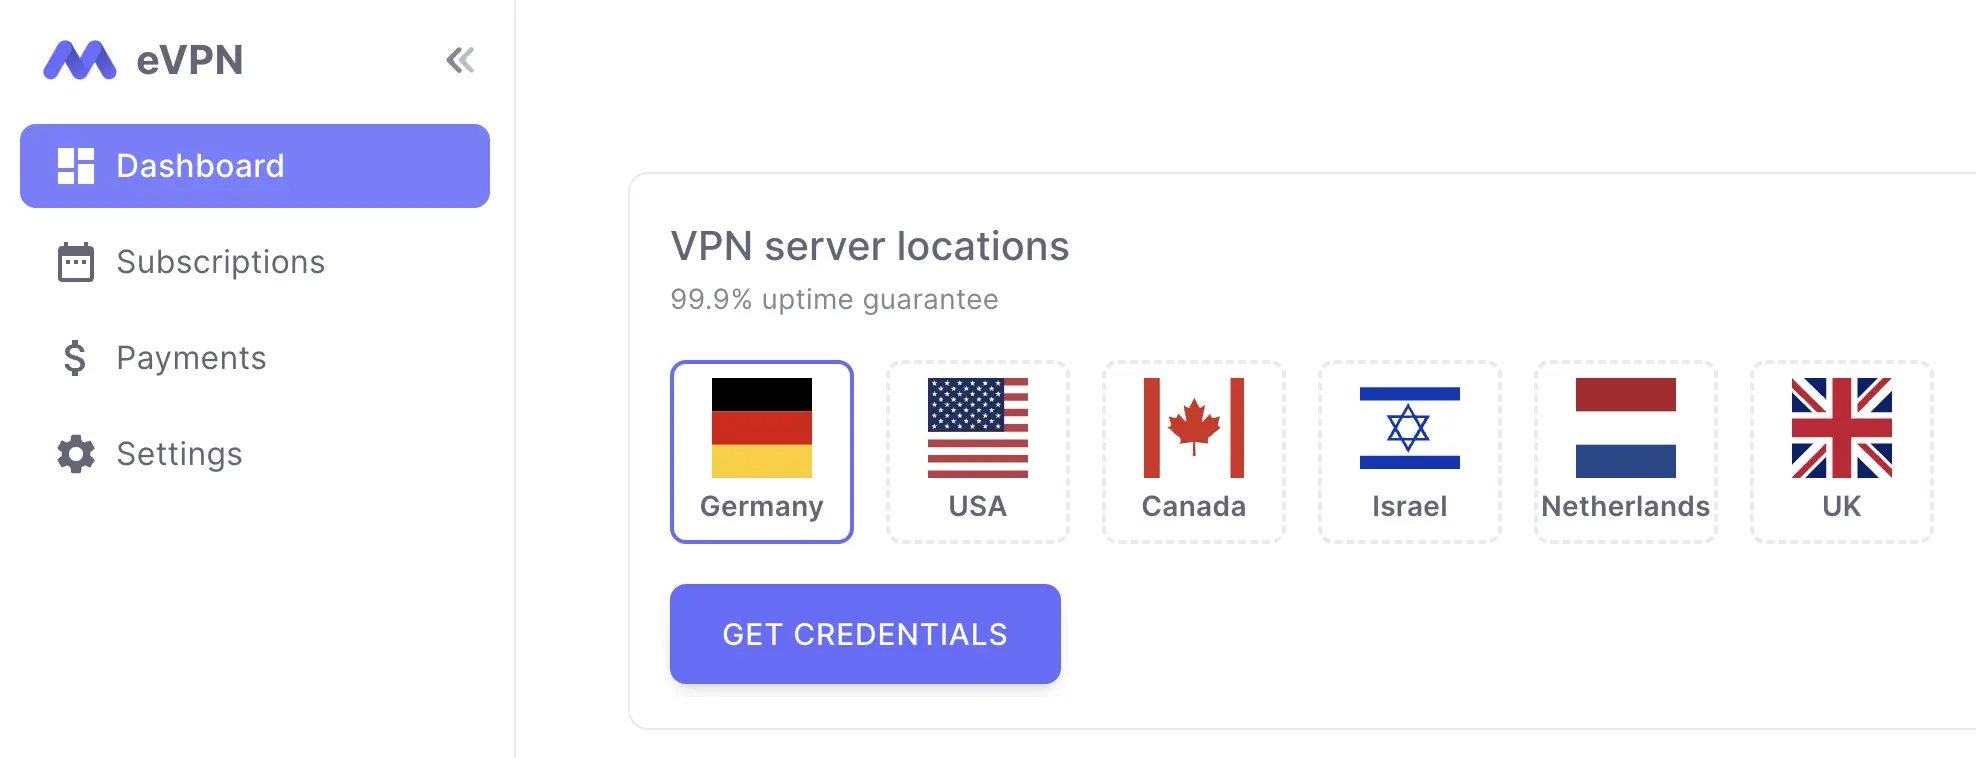
Log in to your VPN account (if you don't have one, sign up).
-
Select one of the available servers that your subscription allows and click "Get Credentials".
Step 2: Add Cisco IPSec VPN Configuration
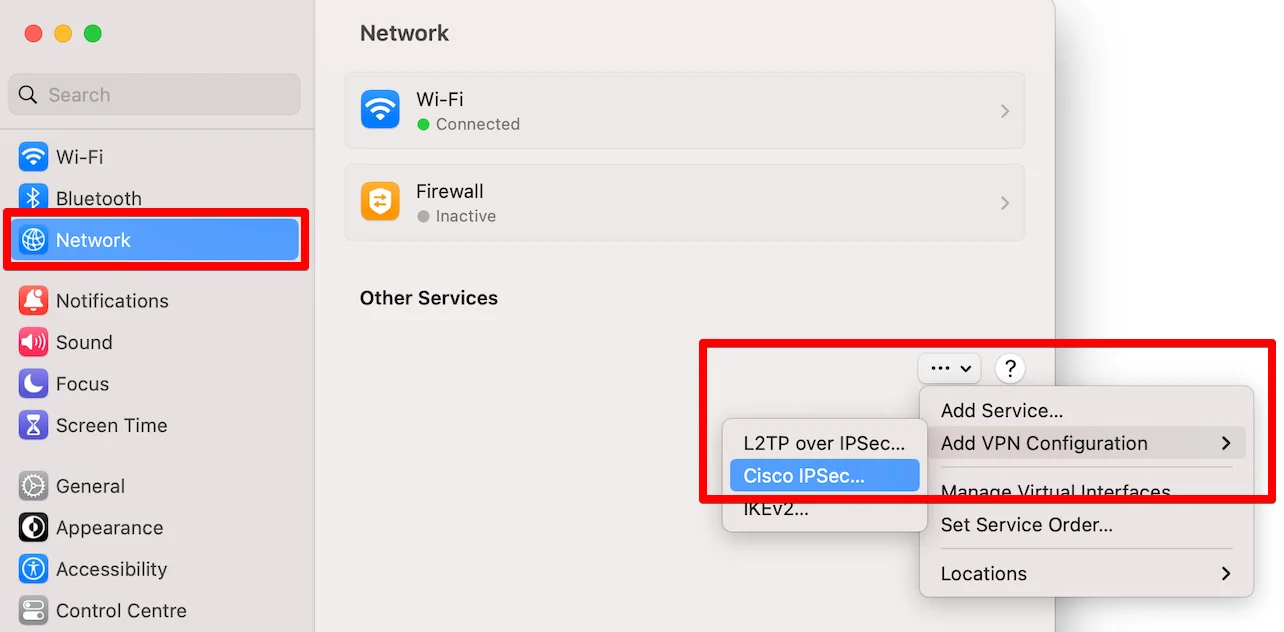
In your account, under the "L2TP / Cisco IPSec" section, you will find the necessary information to add the VPN-configuration via Cisco IPSec or L2TP over IPSec ("Server Address", "Account Name", "Password", "Shared Secret").
-
Go to "System Settings" > "Network" > "Add VPN Configuration" and select "Cisco IPSec".
-
Fill out the form as shown in the screenshot below and then click "Create".
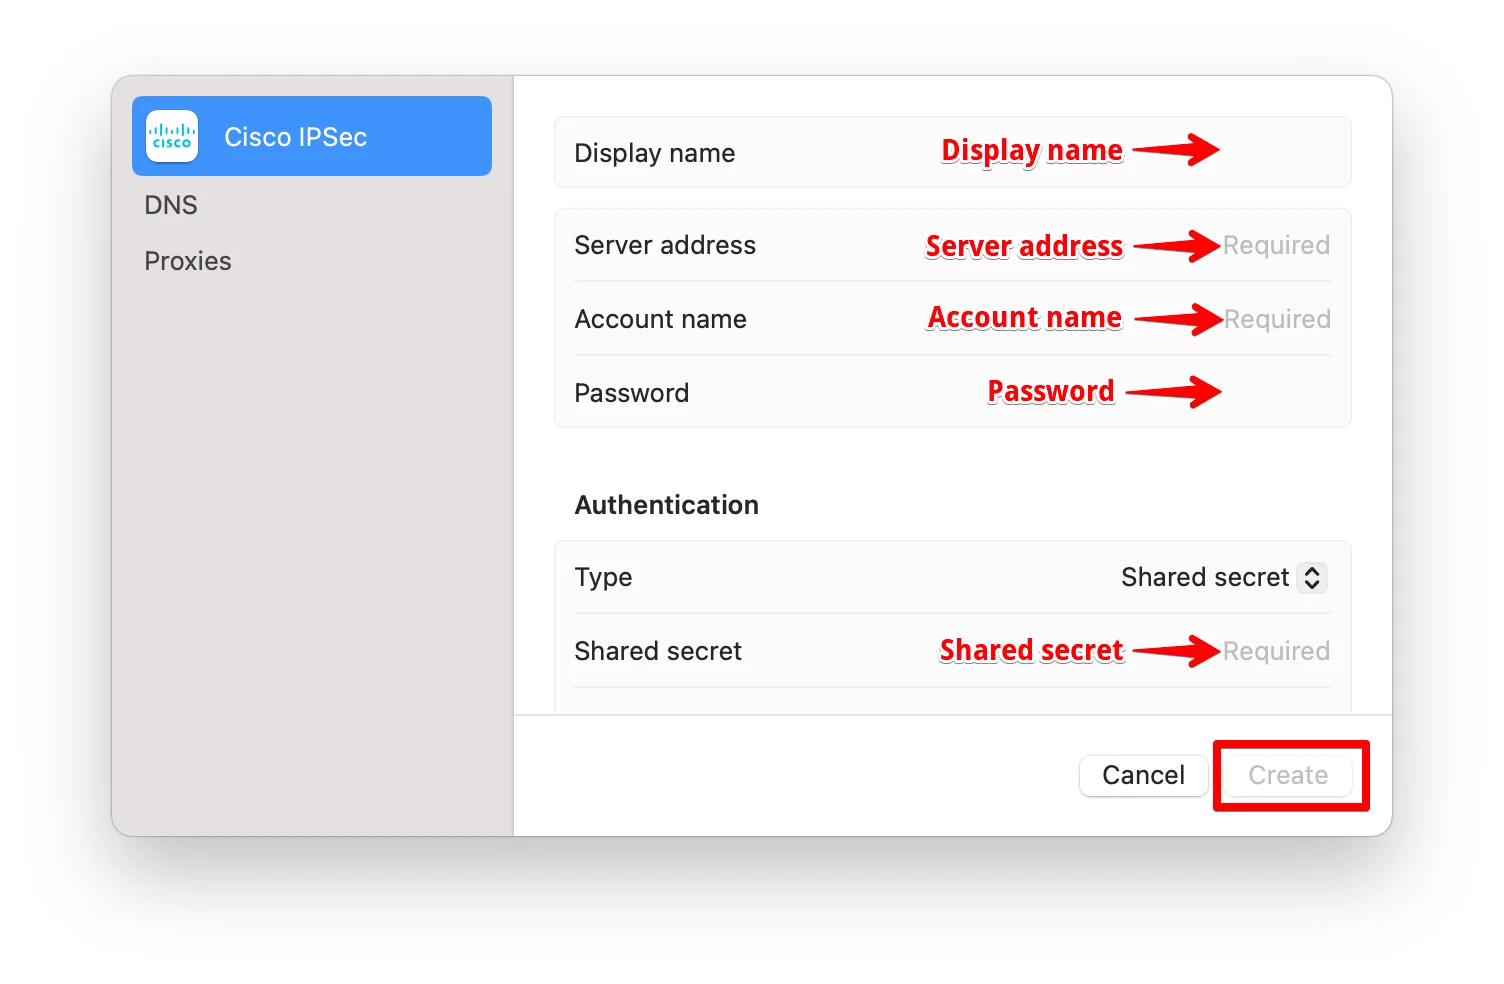 Congratulations! Your Cisco IPSec VPN is configured. Now you can use the fastest and most popular VPN anytime!
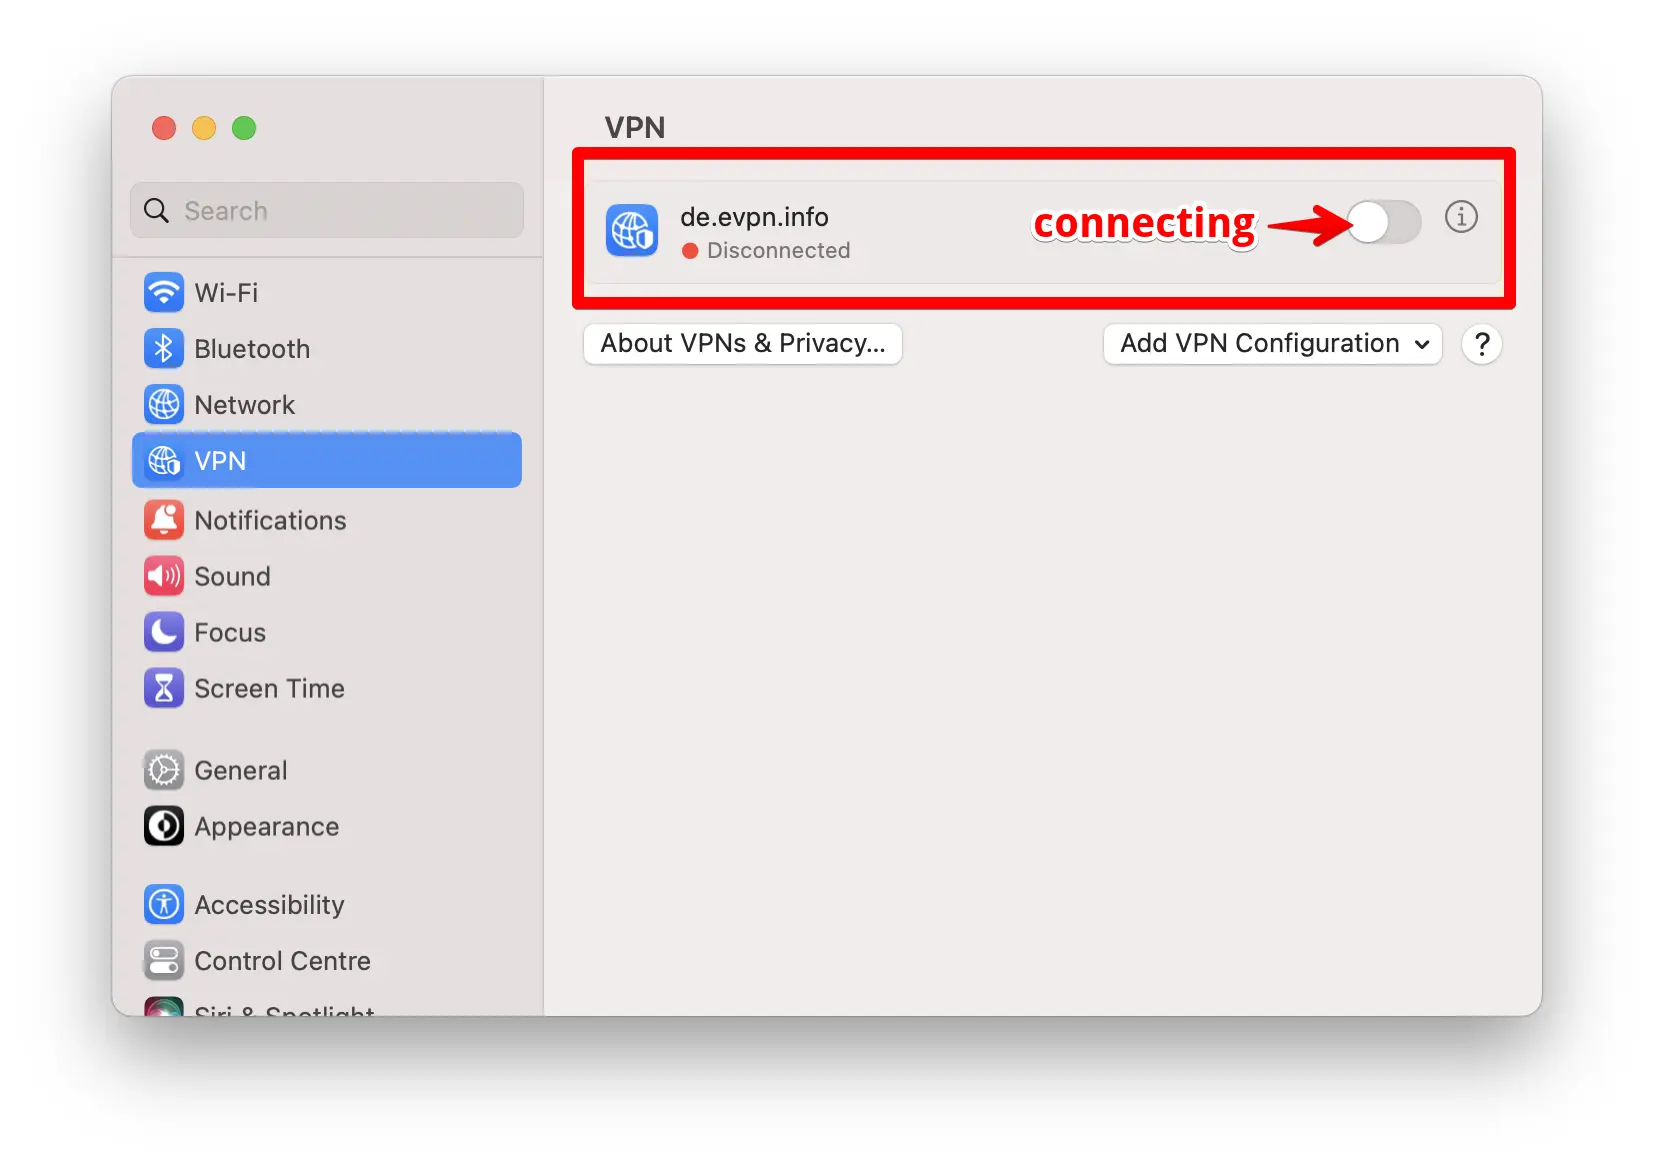
Step 3: Checking Your VPN Connection
-
Go to "System Settings" > "VPN" and turn on the switch as shown in the screenshot above.
-
Open any location check site like https://ipaddress.my/ and make sure that the country you selected when obtaining your personal VPN settings is detected.
We recommend turning on the VPN status icon in "System Settings" > "Control Center" > "VPN" > Select "Show in Menu Bar".