Step 1: Obtaining Personal VPN Settings
* You can skip this step if you have already registered and created your personal settings.
-
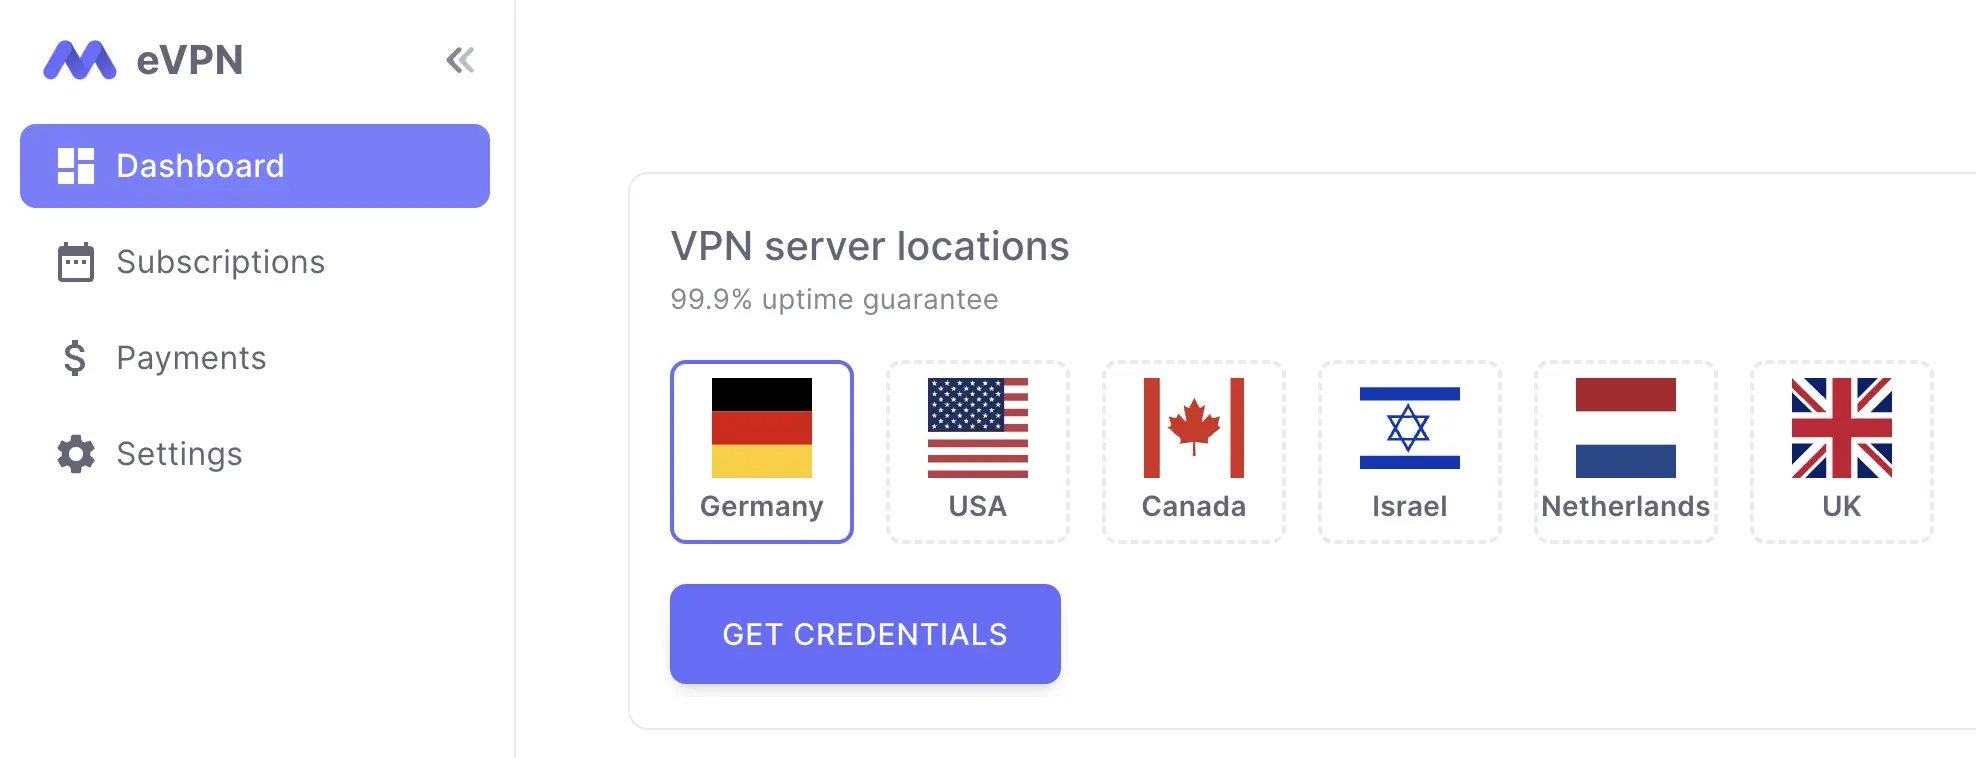
Log in to your VPN account (if you don't have one, sign up).
-
Select one of the available servers that your subscription allows and click "Get Credentials".
Step 2: Installing a VPN Profile on Mac
-
In the "IKEv2" section, a configuration profile in the ".mobileconfig" format will be available. Download it to your Mac and double-click to open it.
-
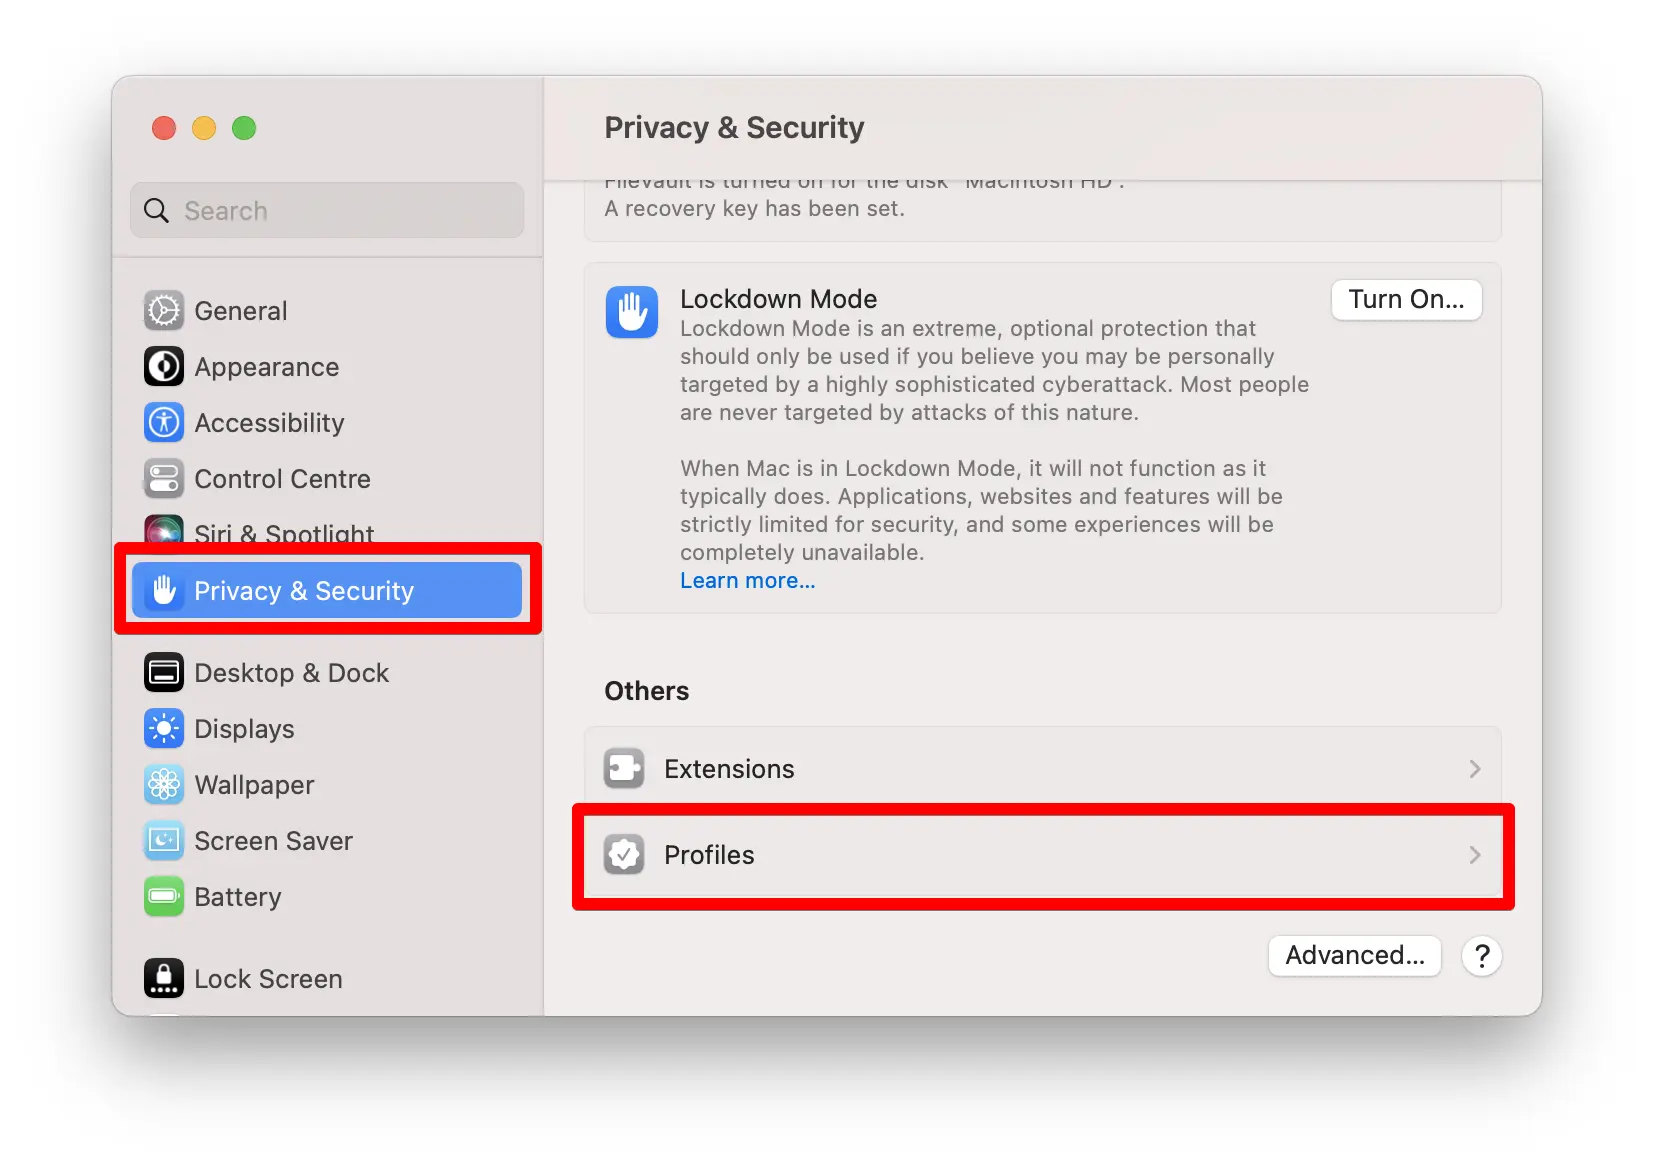
Navigate to "System Settings" > "Privacy & Security" > "Profiles".
-
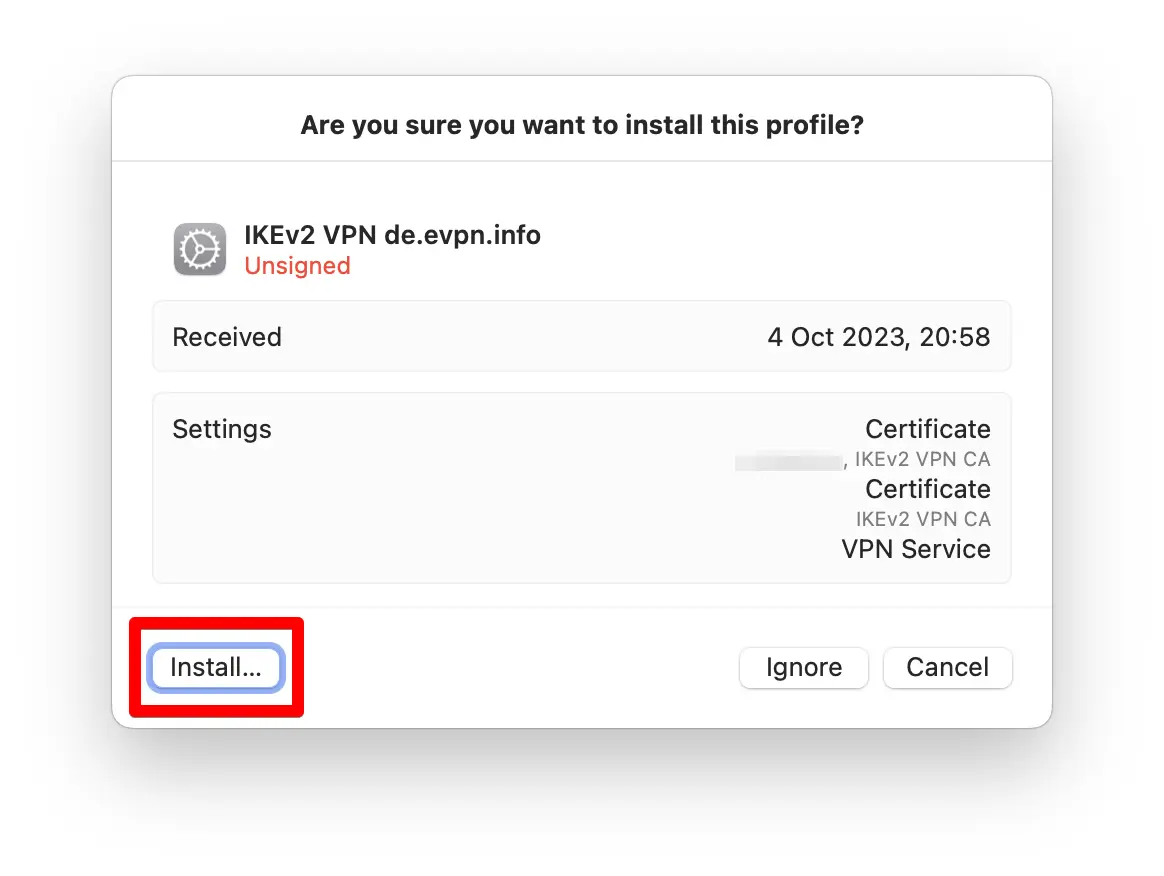
Double-click on the "IKEv2 VPN xx.evpn.info" profile (where "xx" is the country code you chose when receiving your VPN settings).

-
Click "Install" to install the VPN profile.
-
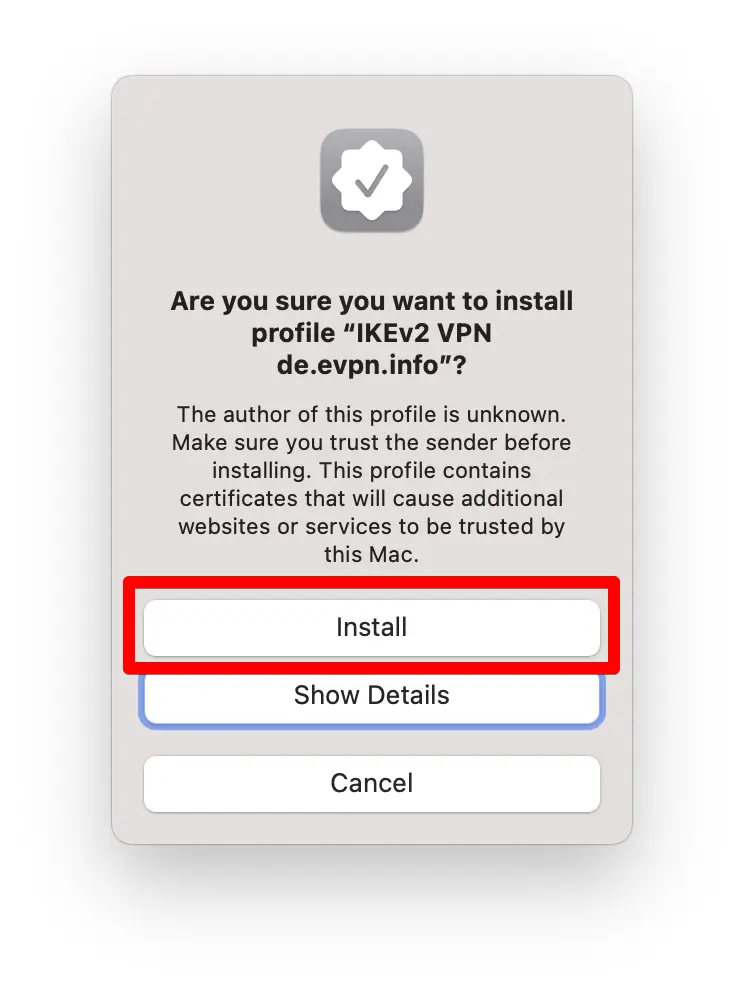
Confirm the installation by clicking "Install" again in the confirmation window.
 Congratulations! Your IKEv2 VPN is now configured. You can use the safest and fastest VPN anytime.
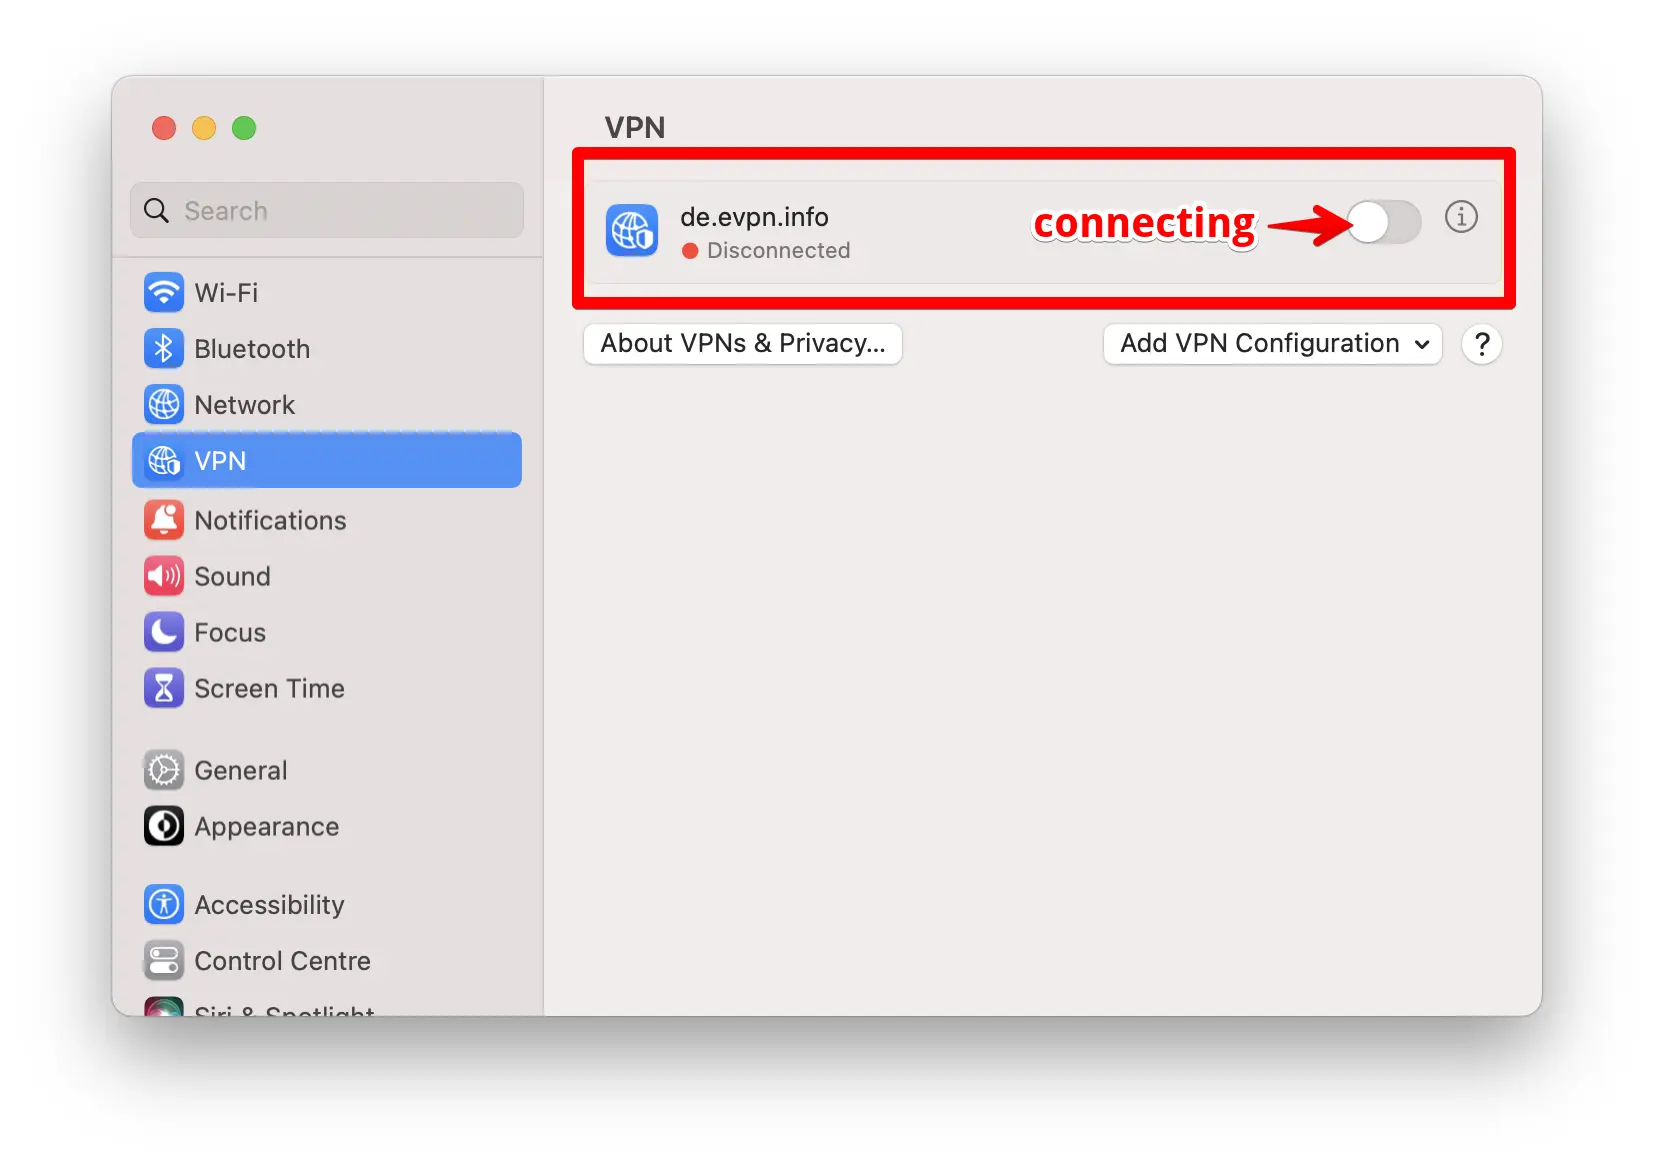
Step 3: Checking Your VPN Connection
-
Go to "System Settings" > "VPN" and turn on the switch as shown in the screenshot above.
-
Open any location check site like https://ipaddress.my/ and make sure that the country you selected when obtaining your personal VPN settings is detected.
We recommend turning on the VPN status icon in "System Settings" > "Control Center" > "VPN" > Select "Show in Menu Bar".
If necessary, you can delete the VPN profile in "System Settings" > "Privacy & Security" > "Profiles".